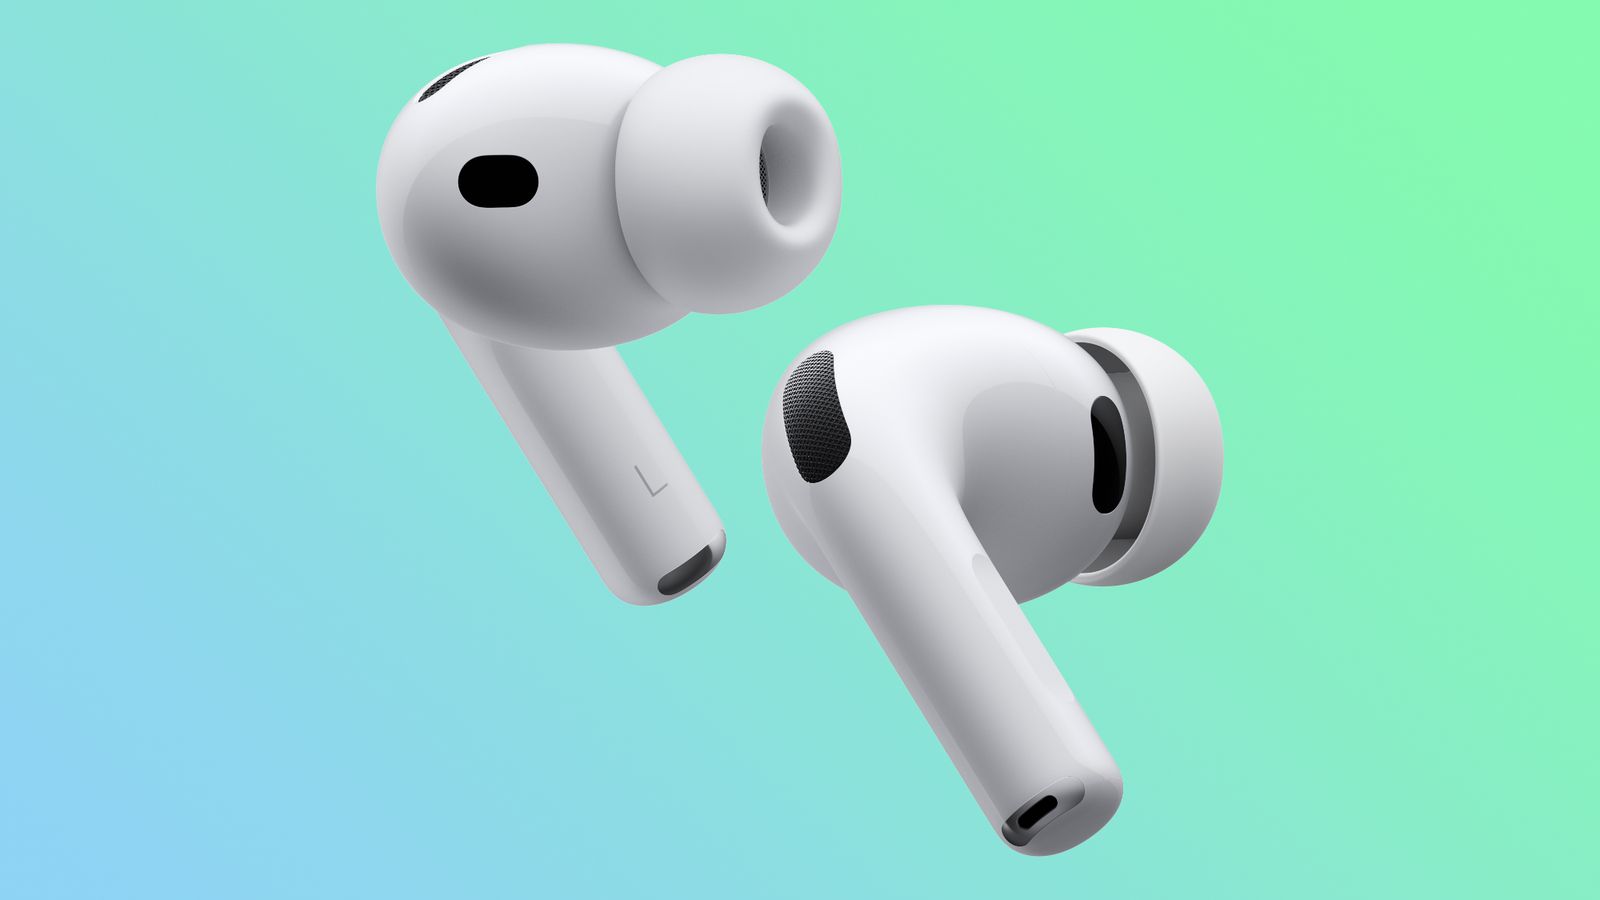
If you own AirPods Pro, you already know they are among the best wireless earbuds in terms of sound quality, especially with active noise cancellation and excellent transparency mode, in addition to deep integration with the Apple ecosystem that provides features like Find My tracking and Live Translate. However, the sound can get even better with simple adjustments. You don’t need an external app or additional equipment; everything you need is right inside your Phonegram settings. Here are three quick tweaks that will significantly improve your listening experience.
Enable Headphone Accommodations to adjust the tone to your preference
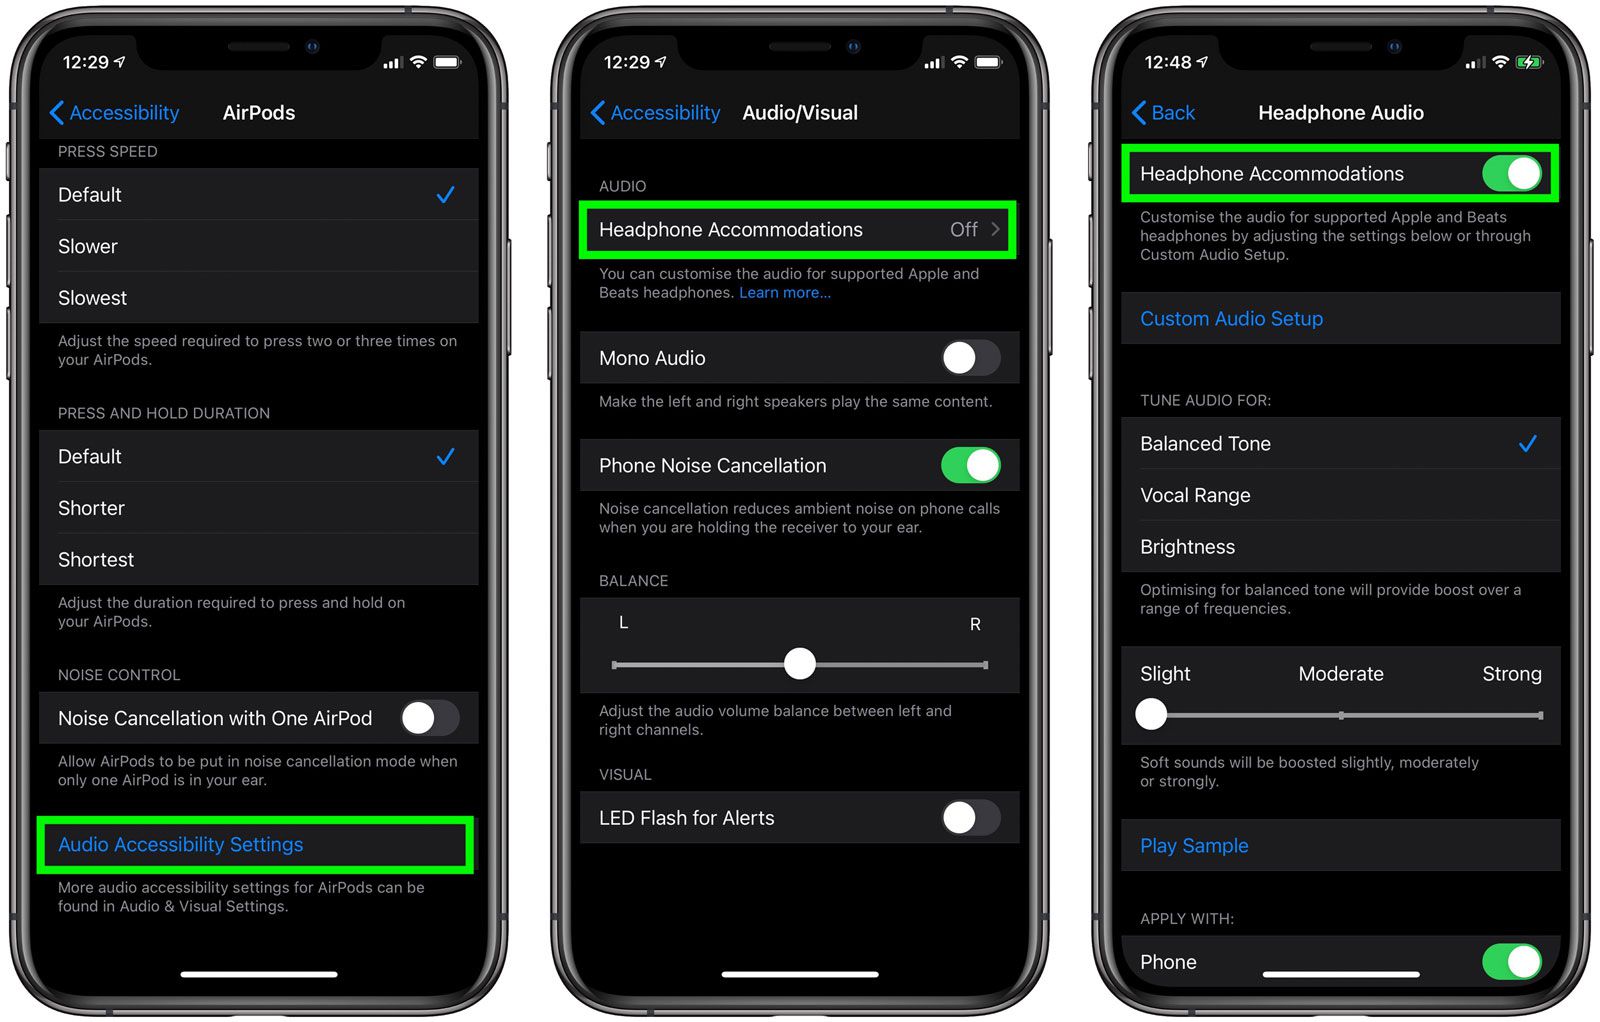
AirPods Pro do not offer a traditional, precise equalizer, but Apple provides a powerful tool within the Accessibility settings called Headphone Accommodations.
This tool allows you to choose a sound profile that suits the type of audio you are listening to:
◉ Balanced Tone: General balance with a slight boost to certain frequencies.
◉ Vocal Range: To increase voice clarity, which is excellent for Arabic vocals.
◉ Brightness: This boosts high frequencies to make the sound feel more vibrant.
You can also adjust the strength of the effect (Slight, Moderate, Strong). Try these settings in a quiet place while keeping noise cancellation enabled, and you will notice a clear difference; the sound might even seem a bit louder.
To access it: Go to Settings > Accessibility > Audio & Visual > Headphone Accommodations.
Test the acoustic seal for the best isolation
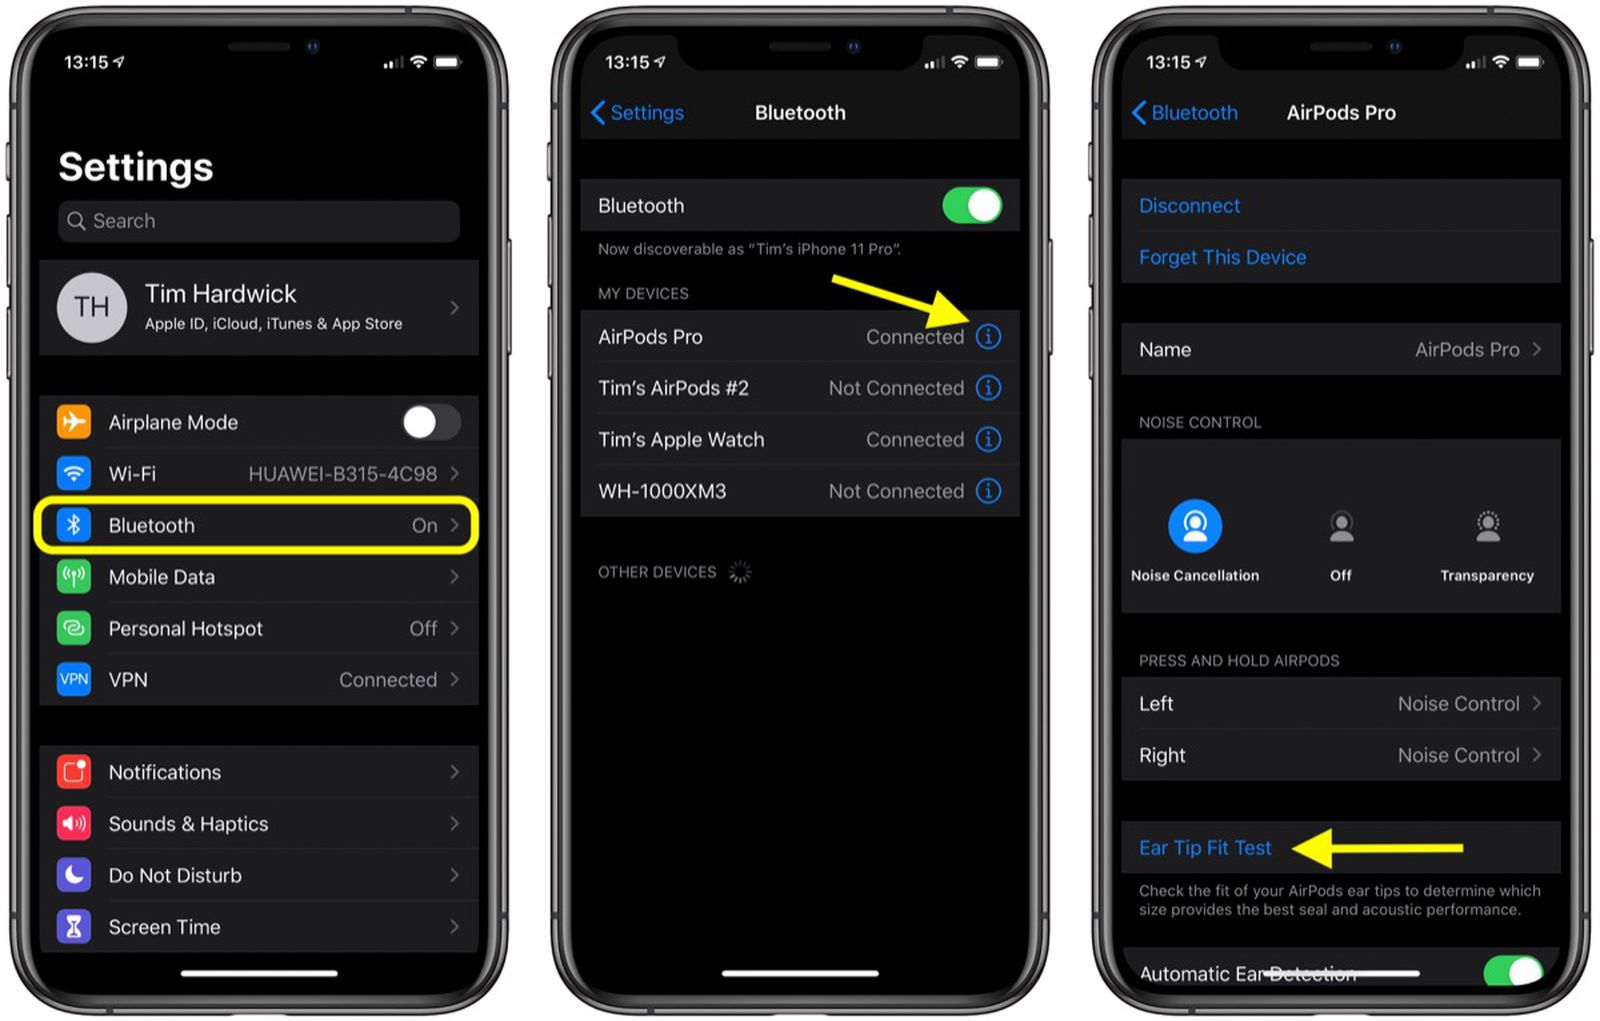
The Acoustic Seal Test is the secret to true sound quality. If the ear tip is not a proper fit, external sound leaks in and ruins the balance, weakening the bass and clarity.
AirPods Pro (especially the third generation) come with multiple tip sizes (XS, S, M, L, XL in some versions). Don’t just settle for the size that feels comfortable; try the acoustic seal test.
Steps:
◉ Open Settings > Bluetooth.
◉ Tap the “i” icon next to your AirPods Pro name.
◉ Select Test Acoustic Seal.
◉ The earbuds will play tones to evaluate the seal.
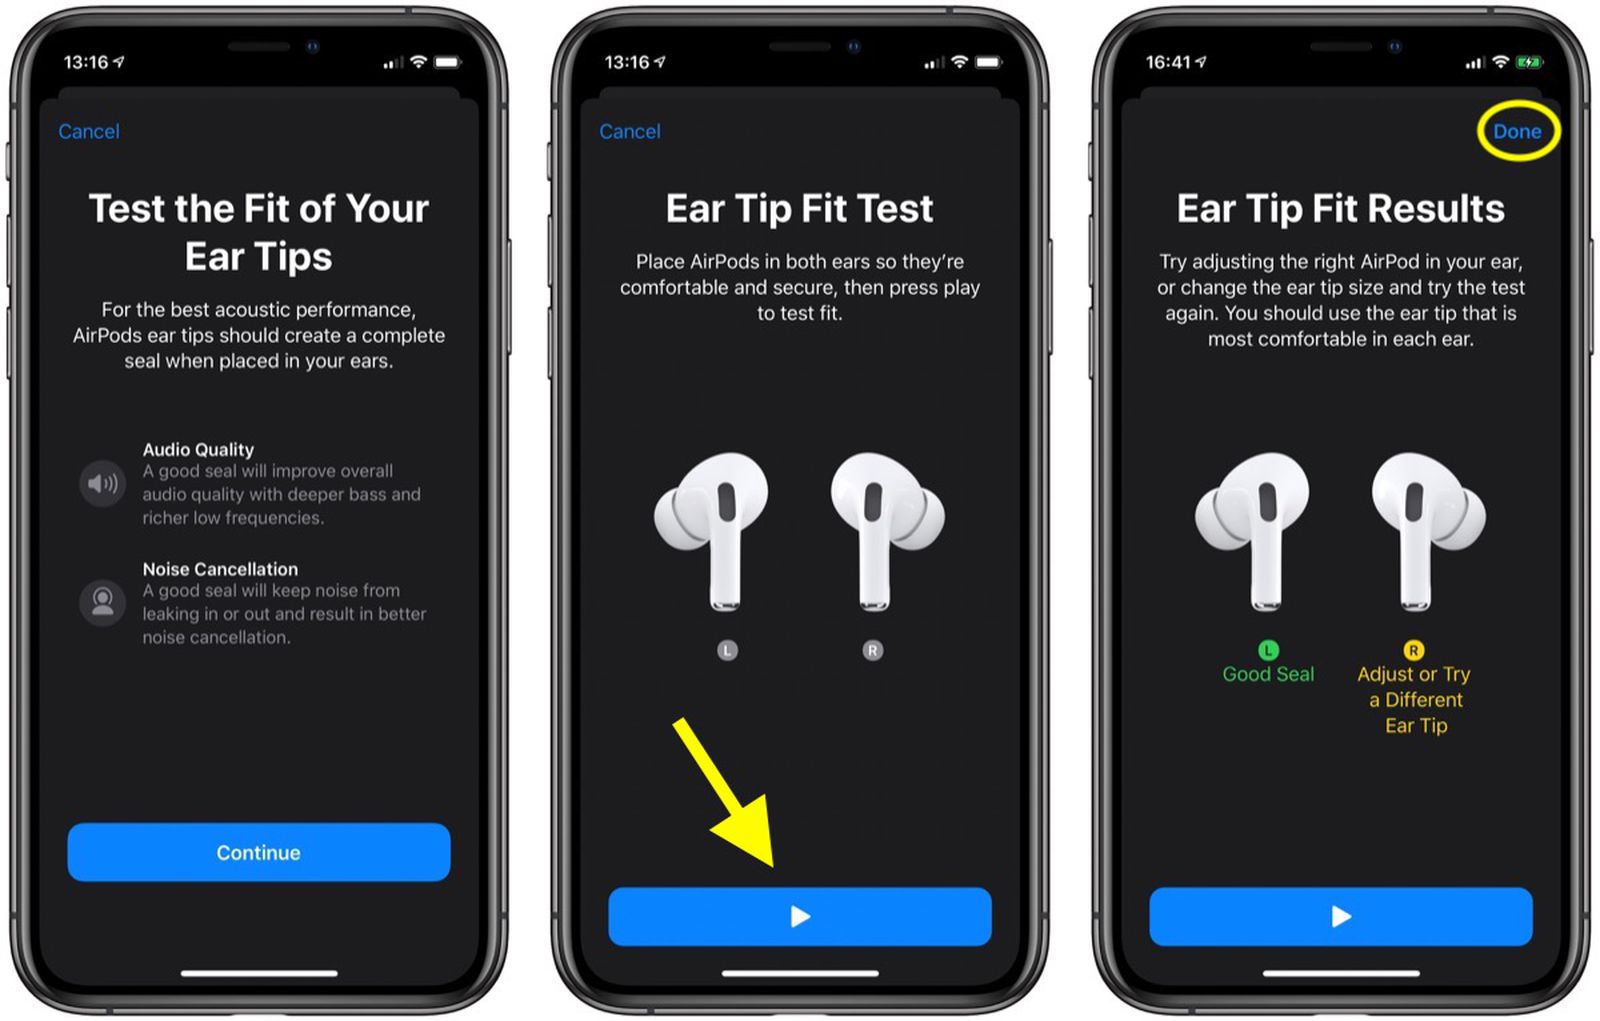
If a “Good Seal” result appears for both ears, that’s great! Otherwise, try another size or readjust the position. Many are surprised by a significant improvement in sound quality and noise cancellation after changing the size.
Enable Personalized Spatial Audio
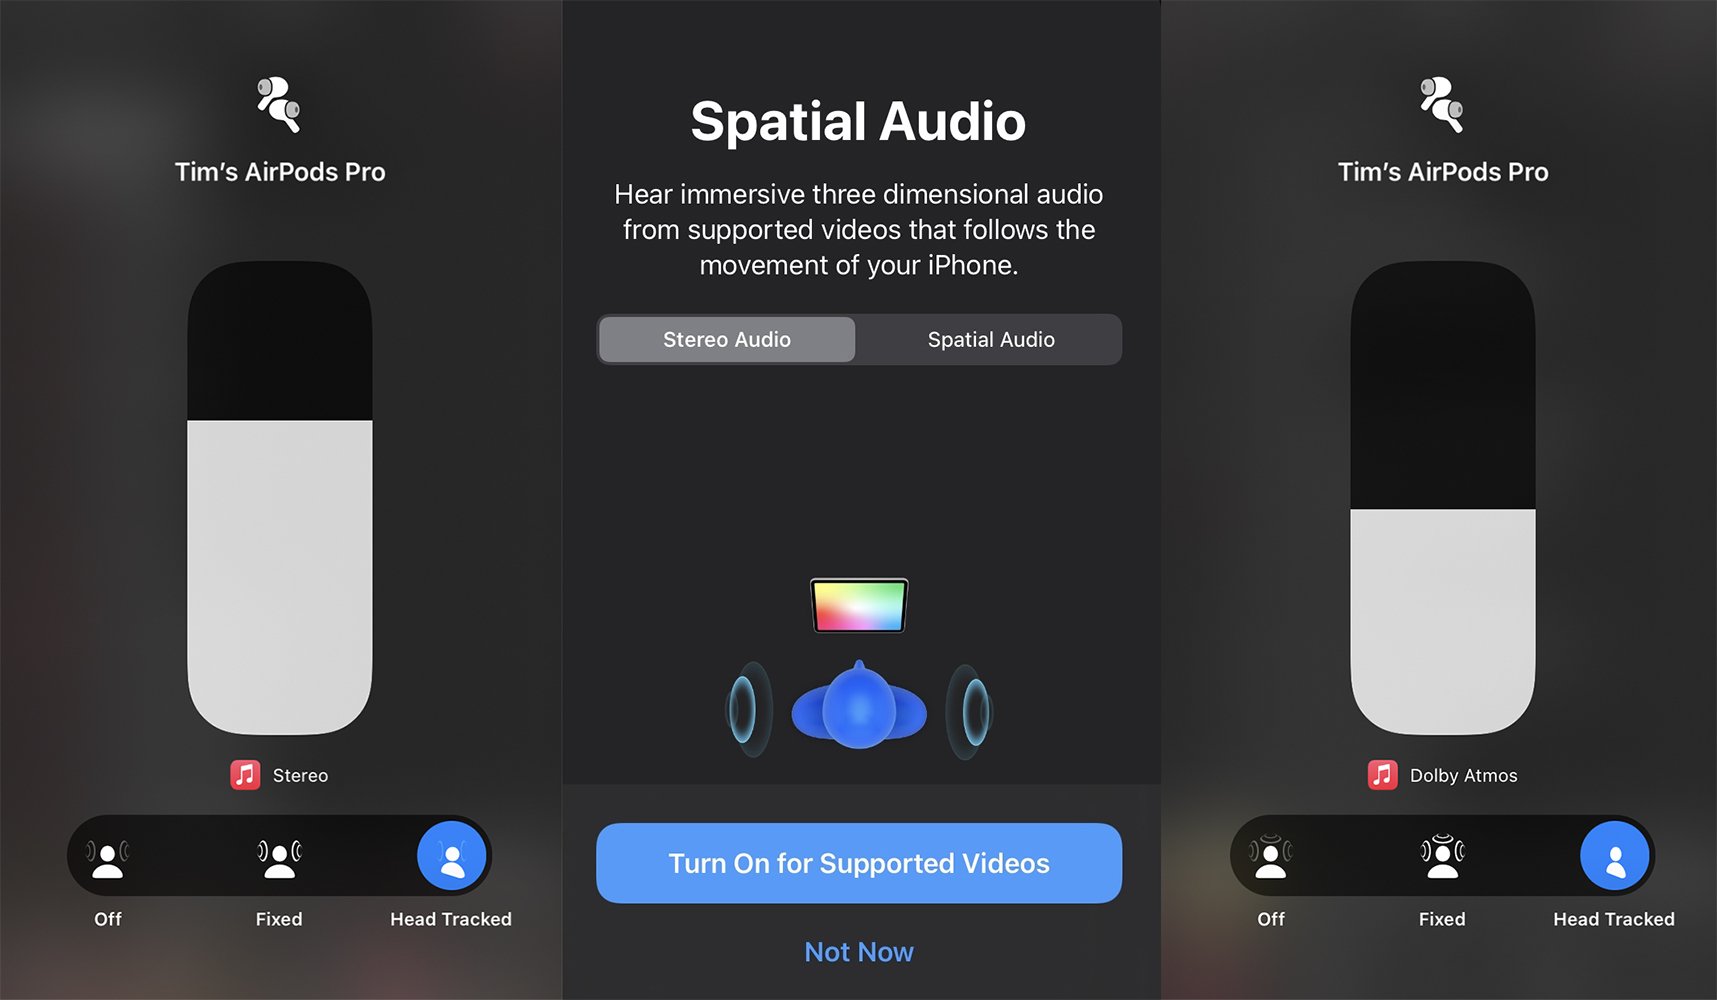
Spatial Audio transforms stereo sound into a 3D experience, as if the audio is coming from all around you. However, the Personalized version takes it a step further by using the Phonegram camera to measure the shape of your head and ears, making the experience even more accurate.
Steps:
◉ Go to Settings > Bluetooth > Tap “i” next to your AirPods.
◉ Enable Personalized Spatial Audio.
◉ Follow the instructions to capture photos of your face.
After enabling, choose between:
◉ Fixed: Static spatial audio.
◉ Head Tracked: Reacts to your head movement, which is amazing while walking or sitting.
You will feel a big difference in depth and immersion, especially with supported movies and music.
By changing just these three settings: adjusting the tone, testing the acoustic seal, and personalizing spatial audio, you will get the best sound quality your AirPods Pro can offer. Try them today, and you will be surprised by the difference. Sound is not just a technical feature; it is a personal experience, and Apple has made it easy to customize.
Source:
Leave a Reply