The iPhone camera application has multiple capabilities that go beyond just capturing great photos and videos, making it the first contender for the best camera phones every year. It is very likely that you have not fully used all the features, tips and tricks offered by the iPhone camera.
Have you ever watched a video on social media, and wondered how it zoomed in and out smoothly without any jitter? Or why your photos are not at the same level of quality? So you should always follow us to demystify these hidden techniques and tricks in the iPhone camera that everyone should be aware of.
Many of the buttons in the Camera app serve multiple functions, and other useful features are hidden out of plain sight within the Settings menus. Our goal is to reveal these hidden features, allowing you to take better photos and videos with the utmost ease and simplicity.
Swipe up for quick access to more controls
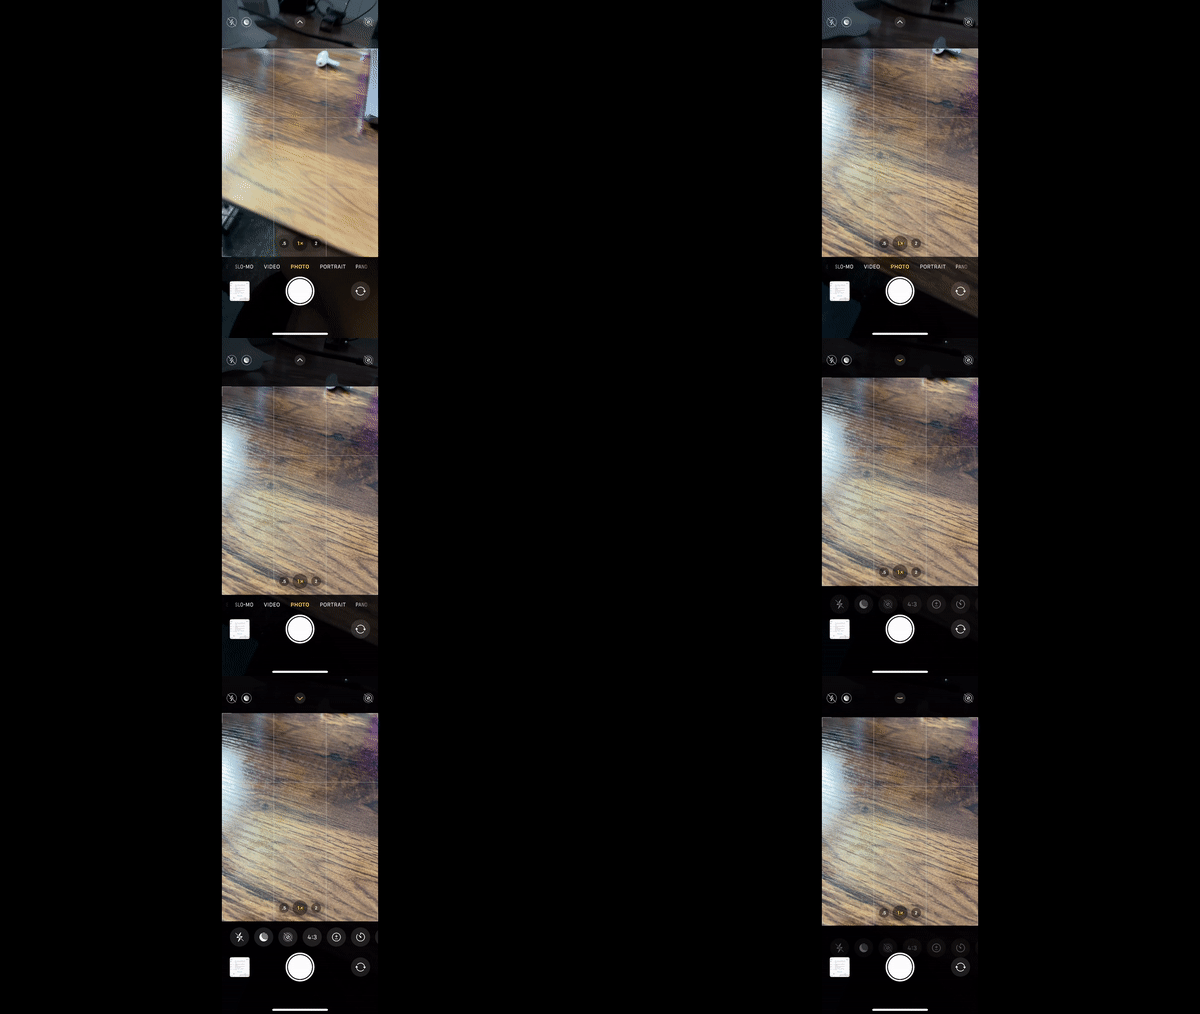
You don't have to click that little arrow at the top of the camera to access additional camera features like filters or aspect ratio. Instead of hitting the arrow at the top of the screen, you can simply swipe up on the screen to bring up all these additional features.
Bonus tip: You can also quickly access the camera from the lock screen by swiping left or right depending on the language of the iPhone, allowing you to capture moments quickly and effortlessly.
Use the sun icon to adjust the exposure
![]()
Many people realize that they can quickly focus on a specific subject or object in a photo by tapping it in the viewfinder, which causes a small yellow square with a sun symbol to appear on the right.
What you may not be aware of, however, is that you have the ability to adjust exposure by moving the sun icon up and down when it appears outside the square. Yes, this is correct! Once the sun icon appears, you can move it up to increase the exposure and create a brighter image, or move it down to reduce the amount of light and make the image darker. This feature allows for greater control over the final outcome of your photos.
Focus and exposure lock
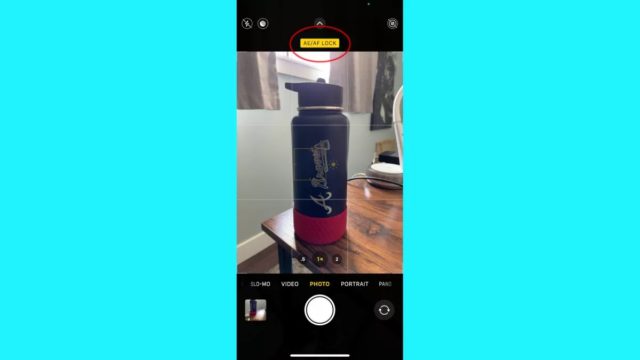
Every time you take a photo, your phone automatically resets its settings, which causes dissatisfaction and tedium especially when you want to take multiple photos of the same subject without resetting focus or exposure each time. But do not worry, There is a solution to this problem known as Exposure / Focus Lock, or “AE / AF Lock” on your iPhone.
Instead of just tapping on the object in the viewfinder to adjust focus, you can tap and hold for a few seconds to activate exposure/focus lock. When you do this, an "AE/AF Lock" dialog will appear at the top of the screen. With this feature enabled, you can now take multiple photos of a specific subject without having to re-adjust the autofocus or exposure settings for each photo. This step ensures consistent focus and exposure across as many photos as you need.
rule of thirds
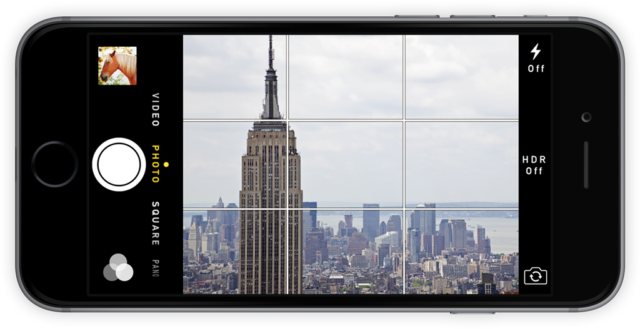
Do you know the "rule of thirds"? It's a basic principle in photography and cinematography, which involves placing the subject in one-third of the screen and leaving the remaining two-thirds open. This technology improves the visual appearance of both photos and videos.
You can enable your camera grid feature to help you. Head to the Camera settings section, scroll down, and enable the 'Grid' option. You'll have guidelines on your screen to help you take better photos, and make sure your subjects are well positioned according to the rule of thirds.
Capture a moving subject clearly
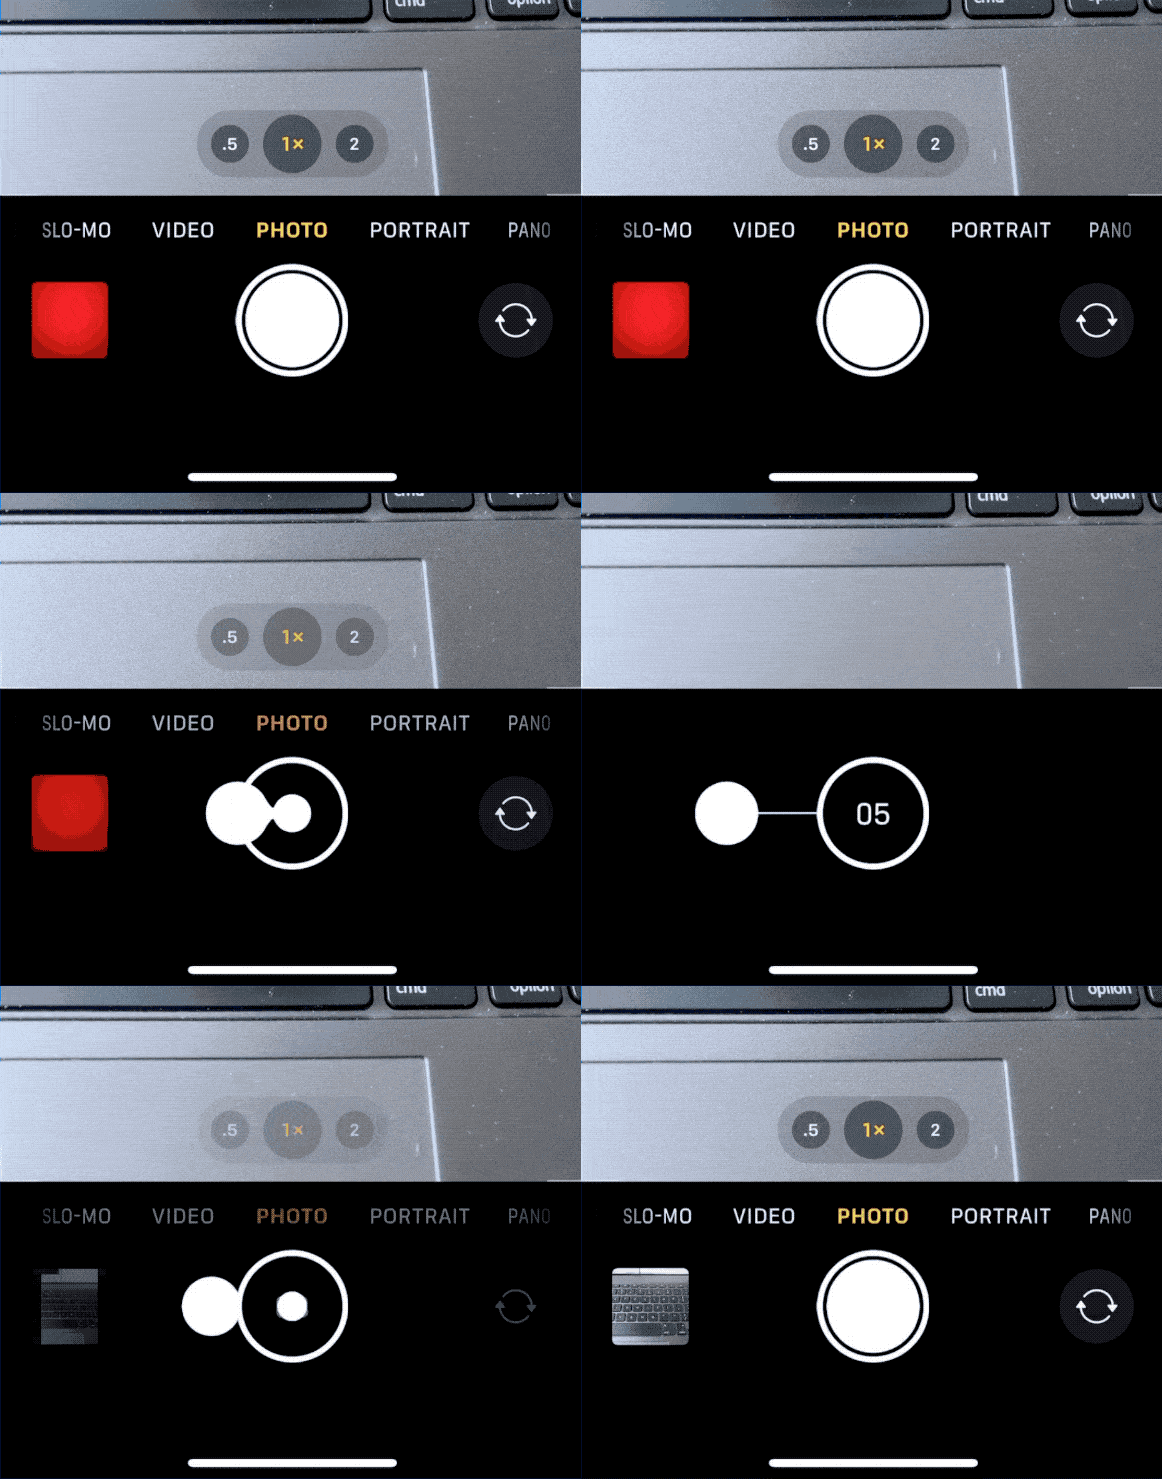
When trying to capture a moving subject in a single photo, it is common for the photos to be blurry. But there is a useful workaround: you can use Burst Mode. This mode allows you to quickly take a series of photos by pressing and sliding the capture button to the left. This rapid succession of shots increases the chances of getting a clear, sharp image of a moving subject. This way, you are guaranteed to capture the perfect moment with minimal distortion and have the freedom to choose the best shot from the series of photos taken and delete the rest.
صور RAW for better editing
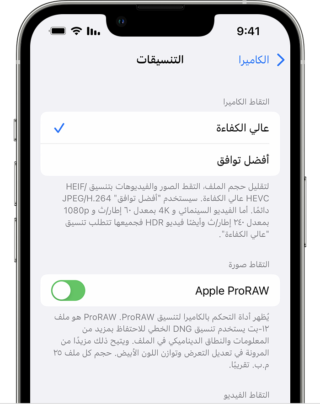
RAW images have digital information that is more ideal for photo editing software. You can take RAW images by turning this feature on in your settings.
Go to Settings > Camera, select a format, then enable Apple ProRAW.
If you like to edit photos in apps or software like Photoshop or Lightroom for example, taking RAW photos is ideal, even though they take up a lot of your phone's storage.
Add location data to your photos
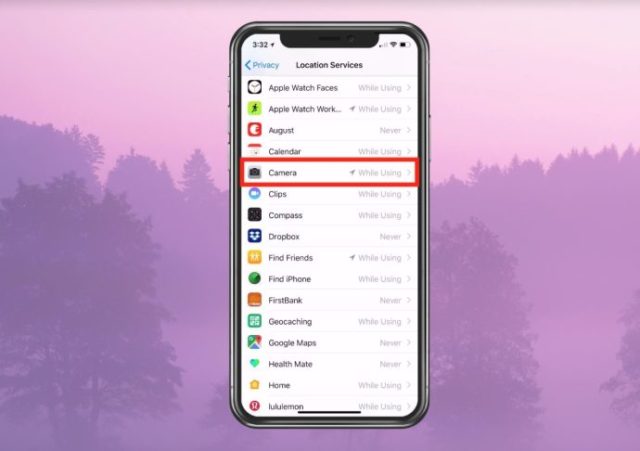
If you find yourself unable to remember the location of the photos, do not worry, as the iPhone can provide you with the location data for your photos. Here's how to enable this feature:
◉ Go to Settings and select “Privacy & Security”.
◉ Access to “Location Services”.
◉ Then Camera, choose While Using the App.

Once this feature is enabled, every photo you take will be accompanied by location information, allowing you to view the exact location on the map where it was taken. This handy addition ensures that you never lose sight of your precious memories.
Have Siri take pictures of you, just say “Watermelon 😂”
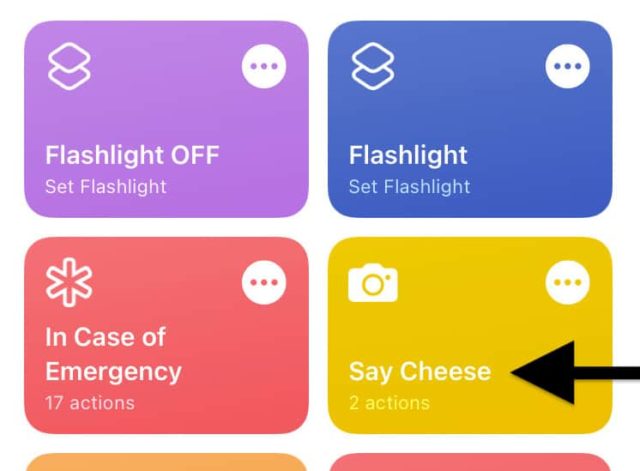
Siri's abilities extend beyond providing information about the weather or otherwise, she can even take pictures of you! To set this up, do the following:
◉ Open the Shortcuts app, then the “Gallery” tab, and search for “Say Cheese” to find the appropriate shortcut.
◉ Then click on the (+) sign next to the shortcut and enable it.
◉ Now, just use the “Hey Siri, Say Cheese” voice command to have Siri take a picture of you.
But keep in mind two important points: the iPhone must be unlocked, and the Camera app should not already be open. By following these steps, Siri becomes your helpful assistant for taking photos quickly.
Secret capture button functions

The photo capture button has many useful and hidden features. Pressing and holding it turns the camera into a video recorder, and letting go stops video recording.
Moreover, while recording a video, you can slide your finger up to zoom in and out. Pressing and sliding the capture button to the right activates video recording, while an additional button appears, allowing you to take still shots by pressing it. These hidden functions provide greater flexibility and convenience when using the camera for video and photo purposes.
Source:

5 comment