The document scanning feature may be needed at times and we always resort to applications to do the job. Until Apple introduced the document scanning feature in iOS 11, it was built into the Notes application, which eliminates any other application and thus you can scan any files anytime and anywhere. In this article, we explain three quick steps to scanning any iPhone.

As is well known to all, scanning files on the iPhone is done through the Notes application by creating a new note, clicking the + button and choosing to scan documents.
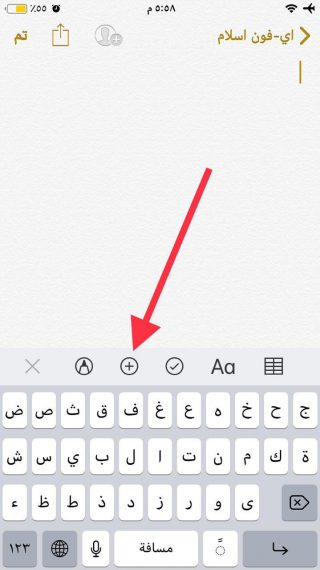
Then choose Scan Files

And you can put a shortcut to the Notes app in Control Center if you want to quickly scan files. Go to Settings - Control Center - Customize Controls and then add notes to Control Center.
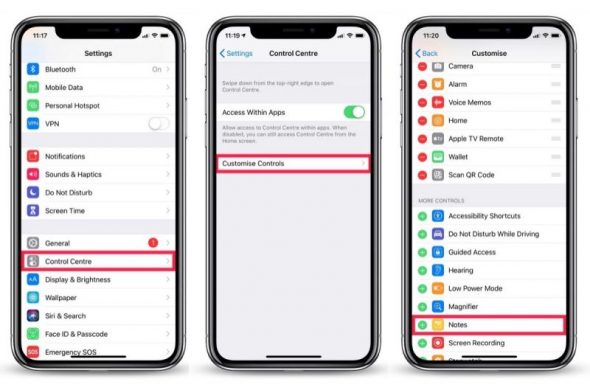
The previous method is the usual one, but you can scan files faster than that, in just three steps. And that is through the Control Center - then press and hold or by using 3D Touch - and then scan the document.
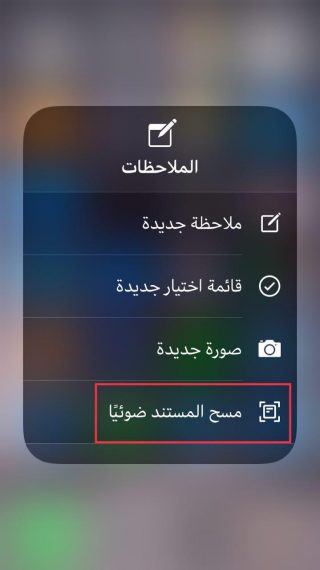
Then click Save to save it as a note. That way you will delete your files and customize them to your liking.
And if you want to create a PDF file, just click on the Share button on the top right
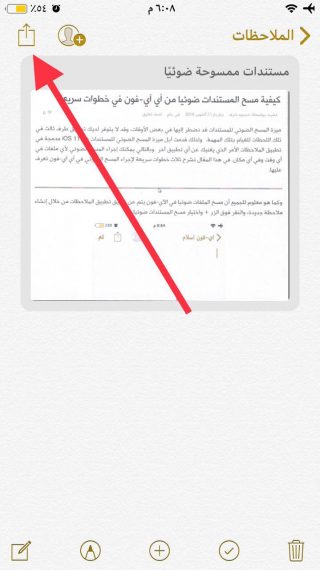
The posts window will be invoked and then choose to create and save a PDF document.
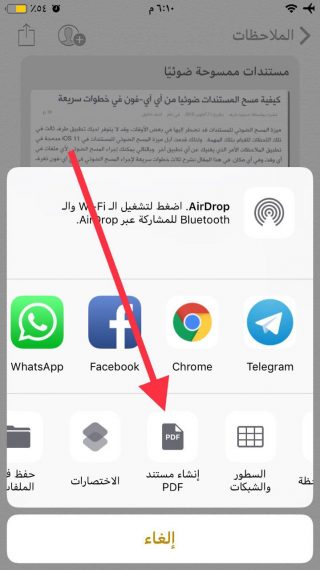
You can choose to save it to iCloud or the Files app, delete it, or you can share it elsewhere as you like.

Source:



30 comment