Have you ever wanted to do professional photo-editing on your iOS device before? Or even you wanted to make strong adjustments to the images, but you can only find them in programs that are complex for many - and expensive - such as Photoshop for a computer? Today we are going to explain PhotoShop Fix on iOS which will enable you to do a lot on your iOS device.
The main facade

When you open the application, it asks you to log in to an Adobe account or create a new account to synchronize data between several devices and you must do so, then you will find an interface like the one shown in the image above. Arrow number 1- Indicates the button to create a new project. Arrow number 2- Opens Photoshop account settings. Arrow number 3- Changes the projects view from full screen, as shown in the yellow box, to a small squares display, so you can see multiple projects together. As for the yellow box, as mentioned, it denotes one of the projects that are displayed horizontally, and when you click on a new project or an existing project, you will be taken to the next editing window.
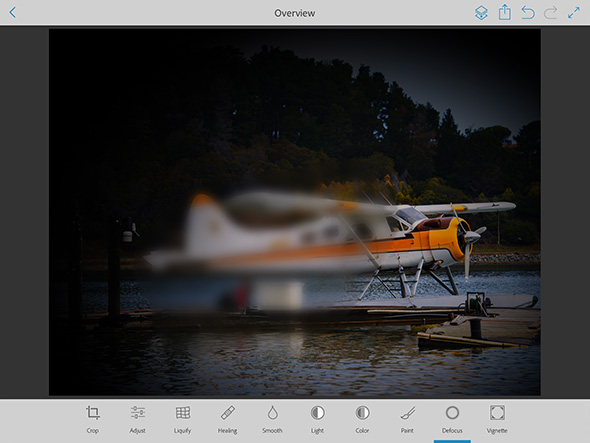
Crop Top
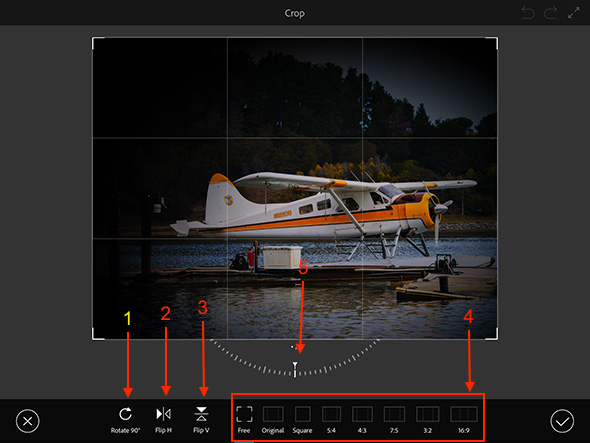
This is the cutting tool and its options are as follows according to the indicated stocks: 1- It allows you to rotate the image ninety degrees and when you click several times it rotates in multiples of ninety if you like. 2- It allows you to invert the image direction as if it were projected in a mirror (reversed on a vertical axis). 3- It also flips the image, but on a horizontal axis. 4- These are sizes ready to crop the image in certain proportions. 5- The dial allows you to rotate the image as desired and in narrow degrees.
Adjust
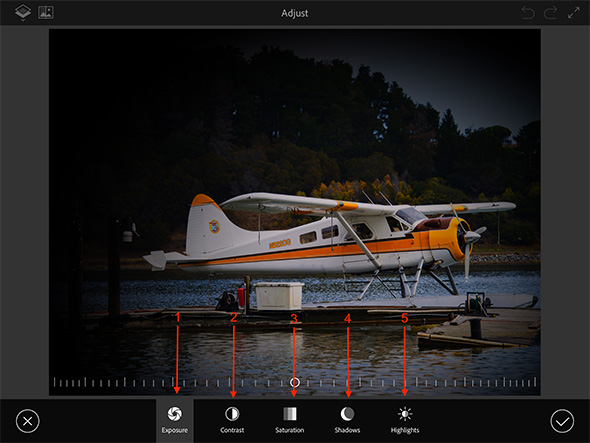
Adjust field is the color adjustment box for the image. You choose the effect and then move the cursor above to adjust the degree of influence. The benefits of the elements in the stock order are: 1- "Exposure" or "brightness" It allows you to adjust the brightness of the image and the degree of light in it. 2- Contrast, which means the difference between colors is very clear. 3- The degree of color saturation. 4- Control shadows for the image. 5- It also allows you to adjust the strength of the color.
liquidate

The Liquify tool is a tool that allows you to change the properties of the elements in an image, as the following will explain: 1- Warp the image as you want it allows you to locate the circle and then move the circle in the direction you want and the result as shown in the image above. 2- A tool to enlarge a specific part of the image in a form similar to shooting with a fish-eye effect or a “tumor”. As shown in the following picture.
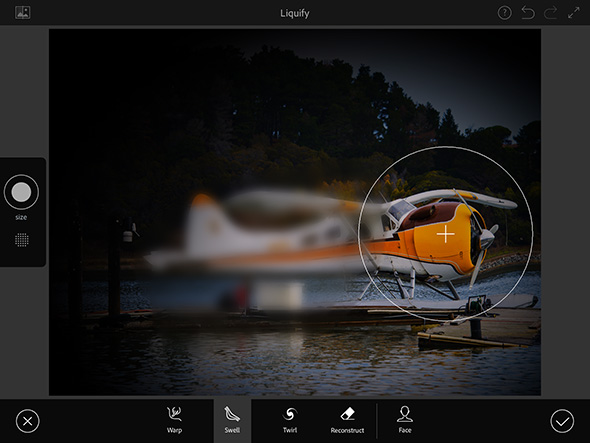
3- This tool allows you to warp an image around a specific point by rotating your finger inside the circle. 4- A tool that allows you to re-correct the image as it was to undo the adjustments. 5- It allows you to change facial expressions, and if the image is of a frowning face, you can make him smile and do several other things. This tool works after you locate the eyes and mouth to find out the characteristics of the face.
Healing
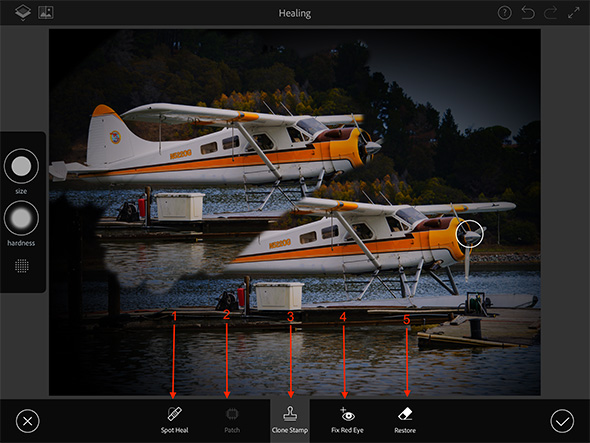
From the name of the tool, which means "cure", if we translate it literally, you can know that this tool is specialized in correcting errors in the image. Jobs in stock order are: 1- It enables you to remove an element from the image. If you want to remove the container under the plane in the image above, you can do so by selecting it after clicking on the tool. 2- It complements the previous tool and allows you to fill in the part that you have erased with another part of your choice of the image, for example if you remove the container but it does not go well automatically and part of the bridge is placed in its place although you want the water background to appear, you can use the Patch tool and then click on the place you want to place A fraction identical to it in the region from which the element was removed. 3- This tool is shown in the image above as it allows you to select a point (marked by the small circle) and redraw it elsewhere. For example, I chose the nose of the plane and then repainted the scene at the top of the image. 4- To fix red eye due to flash. 5- To clear the changes made to the image.
Smooth

This tool has two options. The first option from the left is to make the colors more "smoother" and the second is to make them more "sharp." As for the bar on the left of the image, which contains three tools, it is to change the size and transparency of the paintbrush that you use to adjust.
Light

Light tool that allows you to reduce or increase the brightness of the image.
Colour

This tool is intended to increase and decrease the color saturation in an image.
Paint
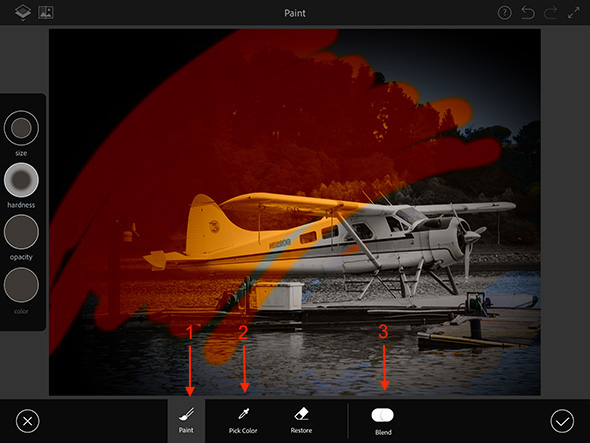
This is the drawing tool. Tool No. 1- It allows you to paint on the image and you can choose the brush color using the side panel to the left of the image or use the tool number 2- Which allows you to choose the brush color using the image to exactly match the color of the area you want. The button indicated by the number 3- It is allowed to make the color transparent and mixed with the image as you can see in the image above. But when the button is closed, the color becomes solid, not showing what is behind it.
Defocus
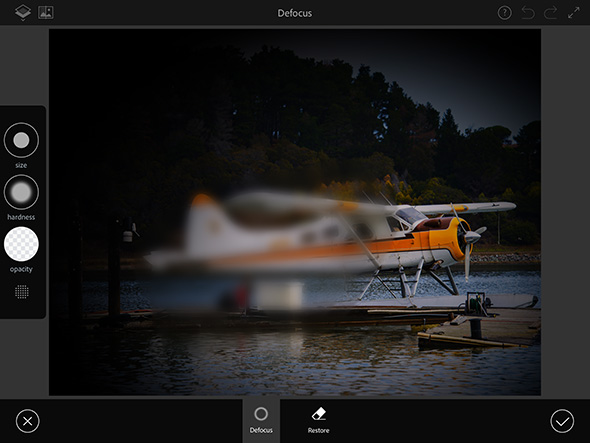
This tool allows you to blur parts of the image, as was done with part of the envy of the plane above.
Vignette
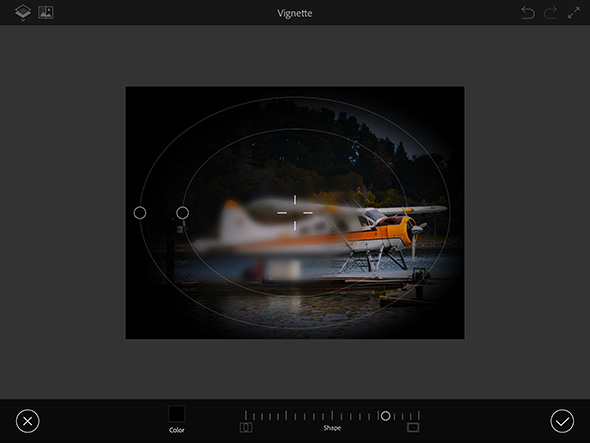
This tool allows you to place the effect of the black frame surrounding the image above (the color can be changed). You can move the tool over the image to change the center of the effect. As for the circles, the outer ones are for choosing the outer and inner borders of the inner borders, while the bar at the bottom is to change the shape of the frame so that it is tilted to a square or oval shape.
finally
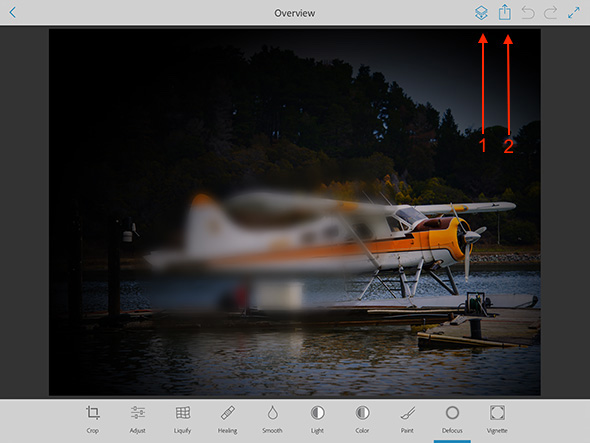
When you are sure of all the changes you have made, you can press the button indicated by the number arrow 1 Which will merge all the modifications in the original image and you will not be able to undo any modification, and you can also click on the share button indicated by the arrow number 2 Save the photo to your photo library or share it to social networks, Photoshop cloud, or Lightroom.


29 comment